How to use the managed build plug-ins?
Prerequisites
After successfully installing the cross build plug-in, before being able to start using it, it is necessary to install one or more toolchains, specific for the projects you plan to create.
Toolchain
For embedded ARM projects, it is recommended to use the GNU Tools for ARM Embedded Processors (arm-none-eabi-*). For all other projects, a good point to start the search for toolchains is the Linaro project.
Build tools (make & rm)
If you run on macOS or GNU/Linux, things are easier, since rm should already be part of the system, and make, if not already there, can be installed by adding the developer package.
On macOS, this can be done by installing Xcode, which from version 5.x, automatically adds the required command line applications. (Older Xcode required a manual install of the Command Line Tools package, from within Xcode).
On GNU/Linux, depending on your distribution, make might be in the standard distribution, or you might need to install some specific developer packages.
In both cases, to check if make is available, run the following command:
$ make --version
GNU Make 3.81
Copyright (C) 2006  Free Software Foundation, Inc.
This is free software; see the source for copying conditions.
There is NO warranty; not even for MERCHANTABILITY or FITNESS FOR A
PARTICULAR PURPOSE.

This program built for i386-apple-darwin11.3.0
Although the managed build process does not require special features from make, it is mandatory that it is a GNU Make, preferably as recent as possible.
On Windows things are a bit more complicated, since neither make nor rm are part of the standard distribution, and need to be installed separately. For more information, please read the separate page Build tools (make & rm) on Windows.
Toolchain path
The locations where the toolchains are installed are not relevant for the plug-in, since the toolchain path is a parameter that can be configured for each toolchain or even for each project.
However, one detail may be important: during toolchain installation, DO NOT add the toolchain path to the system path. If the install procedure does this automatically, then better remove it by hand, to avoid further problems.
Build a test executable application
Probably the main purpose of this plug-in is to built executable applications, more specifically embedded applications to be executed from flash.
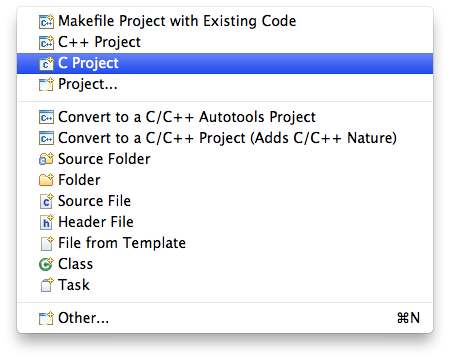
Create a new C/C++ project
To create a new project, go to Eclipse menu, File → New (or the button in the upper left corner), and select C Project or C++ Project:
For more details on creating projects, please see the Create test project tutorial separate page.
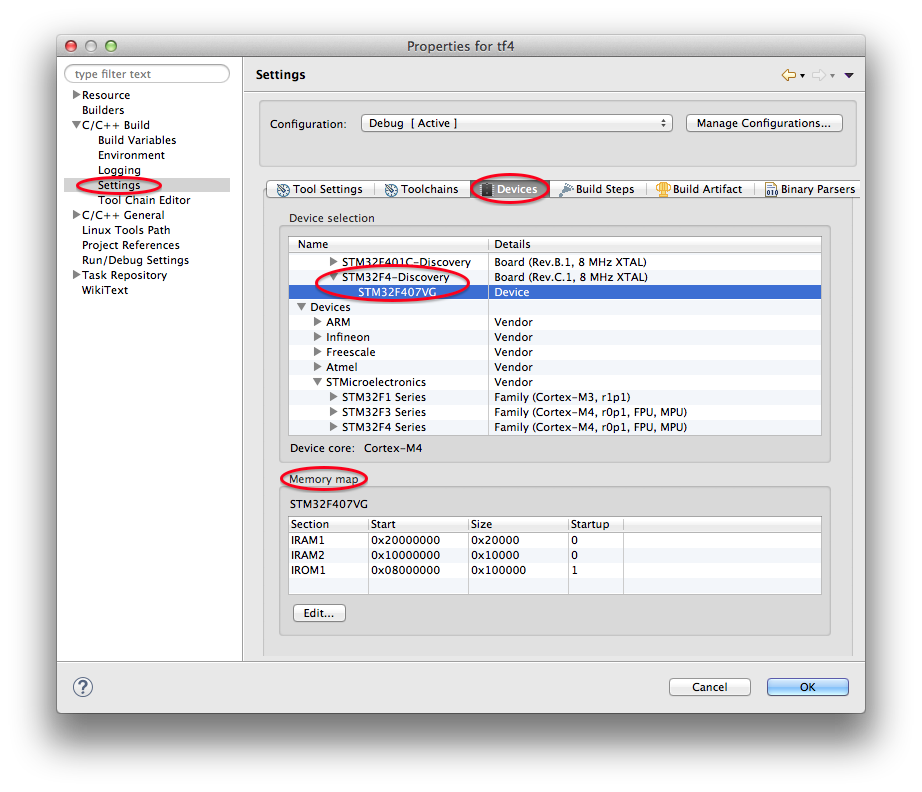
Assign a device to the project
To benefit from the additional information made available by the new packs technology, it is recommended to assign a a device name to the project, in fact to each build configuration.
Configure the target processor
By default, new projects are configured to generate code for the ARM Cortex-M3 processor (in a future version will use the value from the device assigned above).
When using other processors, it is necessary to inform the plug-in of the details, in the Target Processor settings page.
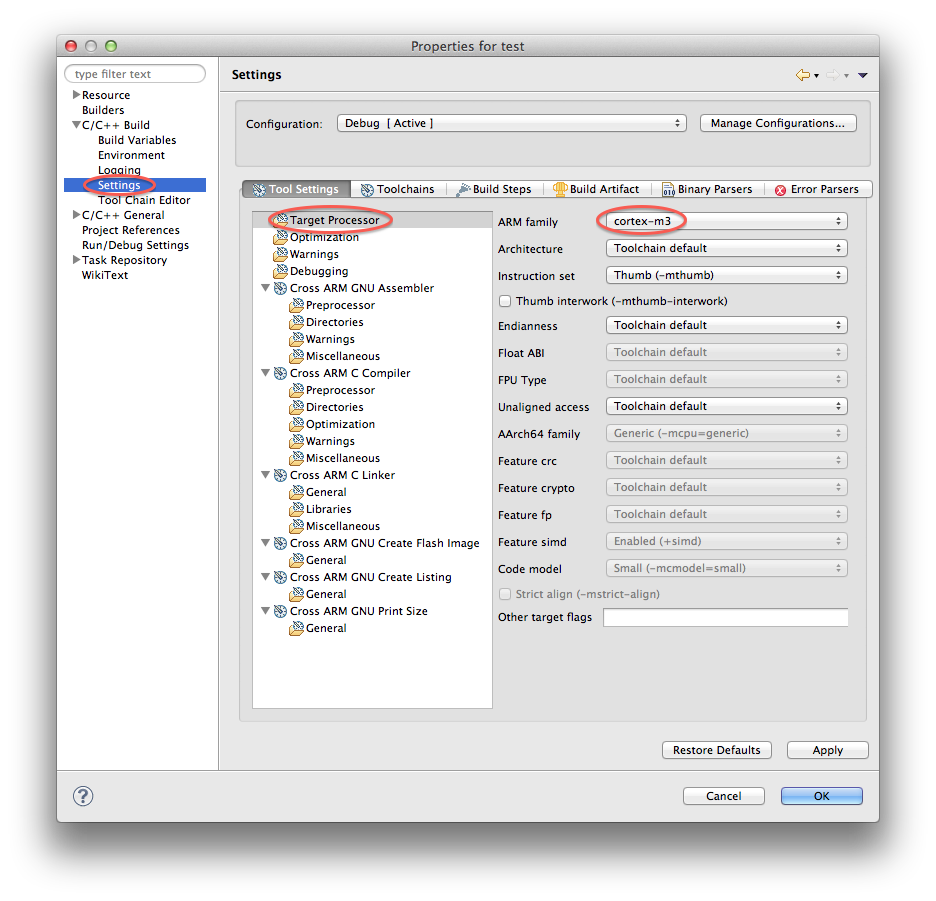
In addition to the ARM family, various other configuration details can be set here, like floating point and unaligned access.
When selecting AArch64 processors in the toolchain setting page, the ARM configuration is disabled, and the AArch64 ones become enabled.
Configure the toolchain path
When the new projects are created with the GNU ARM Eclipse templates, the toolchain path is already configured. Only when importing projects into a fresh workspace, the toolchain path needs to be configured manually for the first build.
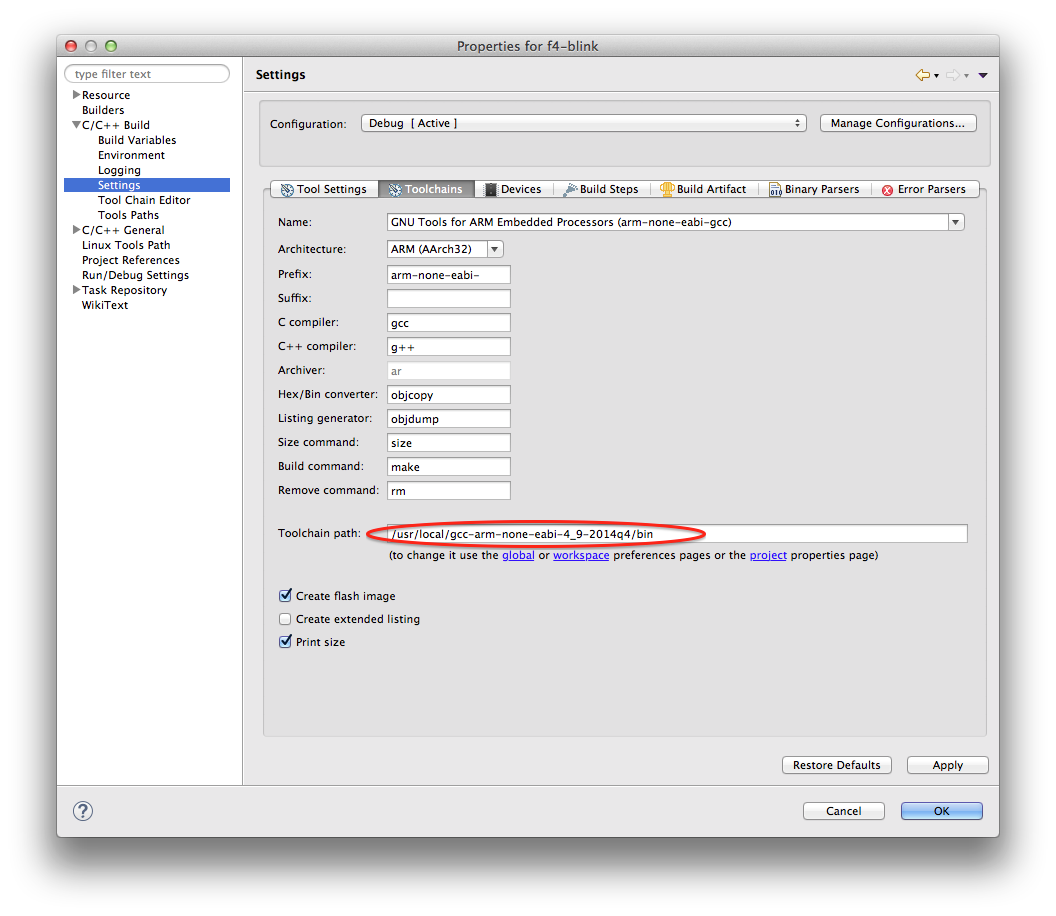
Since this setting refer to the global toolchain path, it will be remembered for all projects using the same toolchain.
Configure the linker script
Linker scripts are usually perceived as some impossible to comprehend, mysterious thing, but the truth is that customising them is not that complicated.
The Hello World ARM Cortex-M3 C Project template provides a starting point for the linker script. In fact there are two scripts, one with the memory definitions (ldscripts/mem.ld) and one with the sections definitions (ldscripts/sections.ld).
For example, the default memory definitions look like this:
MEMORY
{
  FLASH (rx) : ORIGIN = 0x00000000, LENGTH = 128K
  RAM (rwx)  : ORIGIN = 0x20000000, LENGTH = 20K
}
The syntax is quite obvious, the default configurations is for a processor with 128 K flash and 20 K RAM (for example the SM32F103xB family).
If your processor is larger (most probably), edit the LENGTH values accordingly.
The sections definition generally is enough for most C applications. If your processor has additional memory areas, they must be defined explicitly in mem.ld and special sections must be added to sections.ld.
Samples of such definitions can usually be found in the toolchain share folder.
Startup file
The startup file generally depends on the specific processor. The one provided by the Hello World ARM Cortex-M3 C Project template can be used only as a sample, but for a practical applications it is not complete, since processor specific vectors are not there and need to be added.
Generally the startup file should be taken from the processor CMSIS & peripheral libraries provided by the processor manufacturer.
Path persistence
The paths entered in the New Project wizard are stored in a centralised storage in the workspace; for each toolchain that is used, an absolute path is associated; on further wizard invocation this path will be automatically suggested.
Build static/shared libraries
In addition to executable applications, this plug-in can also be used to build libraries, static or shared, usually for embedded GNU/Linux systems.
Static libraries
To create a new project, go to Eclipse menu, File → New (or the button in the upper left corner), and select the C Project and in the C Project window:
- in the Project name: field enter the name of the new project, for example staticLib
- in the Project type: section expand the Static Library type and select Empty Project
- in the Toolchains: section select Cross ARM GCC
- click the Next > button

In the Select Configurations page
- accept the Debug/Release configurations and click the Next > button
- in the Cross GNU ARM Toolchain select the toolchain and enter the path
- click the Finish button
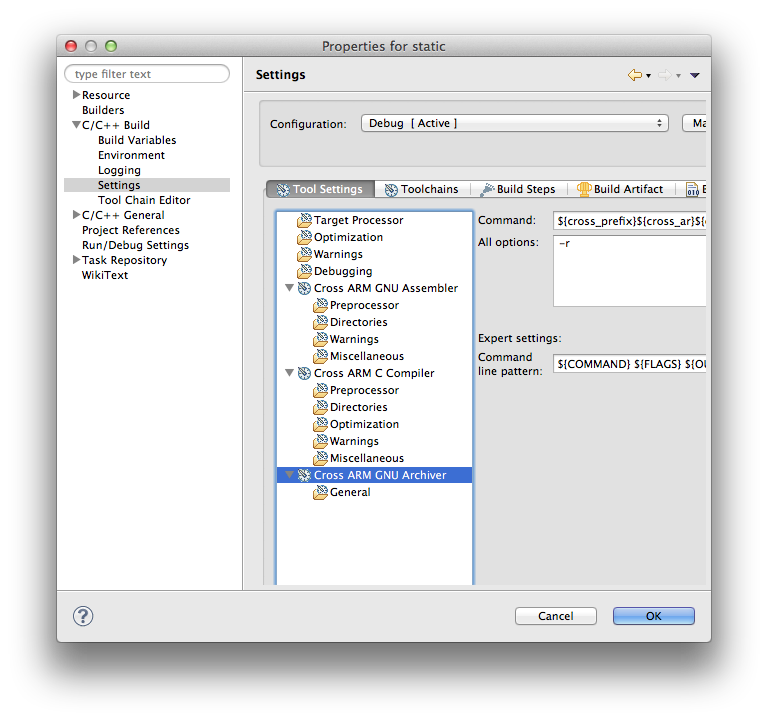
When building static libraries, after all source files are compiled, instead of the link step, the make process calls the archiver to pack all objects together.
Due to the specifics of building libraries, there are no secondary targets (no binary, listing or size).
Shared libraries
The process is similar to static libraries, just that in the final step the linker is called, with special options, to create the shared library.
This feature is useful mainly to larger systems, that support shared libraries, like GNU/Linux; it is of no use for small embedded systems.
