Associate a device to the project
Contents |
Overview
One of the advantages of using the new packs technology is that the extra metadata (which include a complete list of devices, grouped by vendor, family, sub-family, and a list of development boards) can be used to automate the creation of other configurations, like project build configurations and debugging configurations, or assist other processes, like providing detailed register/field definitions to the debugger.
Prerequisites
A project created by GNU ARM Eclipse plug-ins
The Devices tab is visible in the Settings properties page only for projects created by the GNU ARM Eclipse plug-ins.
It is not possible to assign devices/boards to projects created by other plug-ins, because they lack the mechanisms to handle such additional data.
The Packs plug-ins
For the device list to be populated, it is required that the Packs plug-ins are first installed. To check this, use the About Eclipse menu and click the Installation Details button.
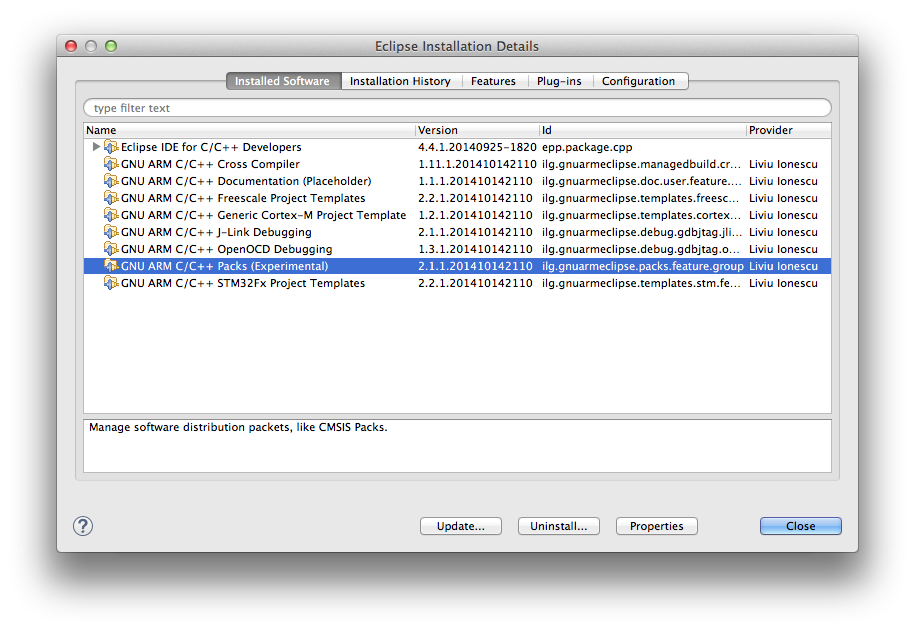
If not present, it is recommended to first read the Packs manager documentation page where installation details are also provided.
Install required packs
Once the Packs plug-ins are available, and the list of available packages was retrieved, it is necessary to install the packages related to the devices used by the projects under development.
Please note that failure to do so will prevent the device selection window to make the desired device available for selection.
Assign device
Notice: for an even higher flexibility, different devices can be assigned to different build configuration, so it is possible to have different devices for different configurations.
One direct consequence is that you need to be careful to associate the appropriate devices to all configurations. The Eclipse interface allows to configure All configurations at a time; select this option in the top selection.
Notice: The Devices tab is visible in the Settings properties page only for projects created by the GNU ARM Eclipse plug-ins.
To assign devices to projects:
- in the Project explorer view, select the desired project
- go to the Eclipse menu and select Project → Properties
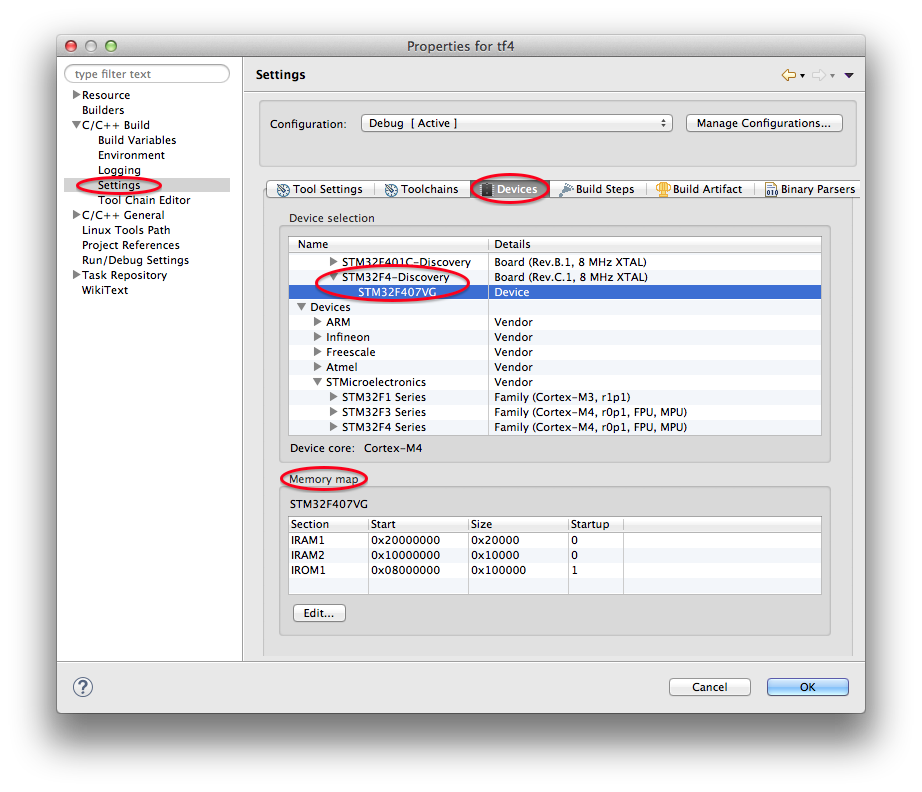
- go to C/C++ Build → Setting
- select the desired configuration (like Debug, Release, etc)
- click the Devices tab
- expand the required nodes and select exactly the device used by the project
- click OK
If you are using a development board, and this board has a corresponding definition in a package, it is recommended to associate the device below the board instead of the individual device from the Devices section, since this will also make available the board documentation files.
Benefits
The benefits of assigning a device to the project are:
- when creating J-Link debug configurations, the device name will be automatically set to the selected device
- during the debugging session, the Peripheral view will be populated with the device peripheral registers
- the documentation view (available in the C/C++ view, next to the Outline view) will be populated with the files available for the device
An even better packs integration (planned for the future release), will make this setting even more convenient, by starting the projects templates with this selection; it is also planned to use this extra data to automatically set the build ARM family.
Accompanying the device there is also a set of definition for the memory map, which will be used in a future release to automatically generate the linker scripts.
